Develop/DevOps
[MLFlow] MLFlow-Keras auto logging example
재융
2022. 1. 21. 12:13
반응형

MLFlow에 대해서 autolog함수를 활용하여 코드작업을 진행한 예시 작성 (안써보면 감이 안오는 타입이라...)
학습 예시 코드
기존에 있던 코드에 mlflow코드만 추가
- https://vitalflux.com/keras-multi-class-classification-using-iris-dataset/
# Import MLflow Modules
import mlflow

import numpy as np
from sklearn import datasets
from sklearn.model_selection import train_test_split
#
# Import Keras modules
#
from keras import models
from keras import layers
from keras.utils import to_categorical
#
# Create the network
#
network = models.Sequential()
network.add(layers.Dense(512, activation='relu', input_shape=(4,)))
network.add(layers.Dense(3, activation='softmax'))
#
# Compile the network
#
network.compile(optimizer='rmsprop',
                loss='categorical_crossentropy',
                metrics=['accuracy'])

# Use MLflow autolog function
mlflow.autolog()

#
# Load the iris dataset
#
iris = datasets.load_iris()
X = iris.data
y = iris.target
#
# Create training and test split
#
X_train, X_test, y_train, y_test = train_test_split(X, y, test_size=0.3, stratify=y, random_state=42)
#
# Create categorical labels
#
train_labels = to_categorical(y_train)
test_labels = to_categorical(y_test)
#
# Fit the neural network
#
network.fit(X_train, train_labels, epochs=20, batch_size=40)

#
# Get the accuracy of test data set
#
test_loss, test_acc = network.evaluate(X_test, test_labels)
#
# Print the test accuracy
#
print('Test Accuracy: ', test_acc, '\nTest Loss: ', test_loss)
MLflow에 등록된 모델 확인
위에 코드를 동작시킨이후에, terminal에서 다음과같은 명령어로 mlflow dashboard활성화
mlflow ui그렇다면 아래와같이 방금 실행했던 학습에 대한 모델정보가 업데이트되어있음

그럼 이제 학습된 모델을 실제로 불러읽어서 prediction하는 코드를 짜보자.
prediction코드는 위 이미지에서 "Models"부분을 클릭하면 아래와같은 창이 보인다. 그리고 해당 코드를 활용하면 된다.
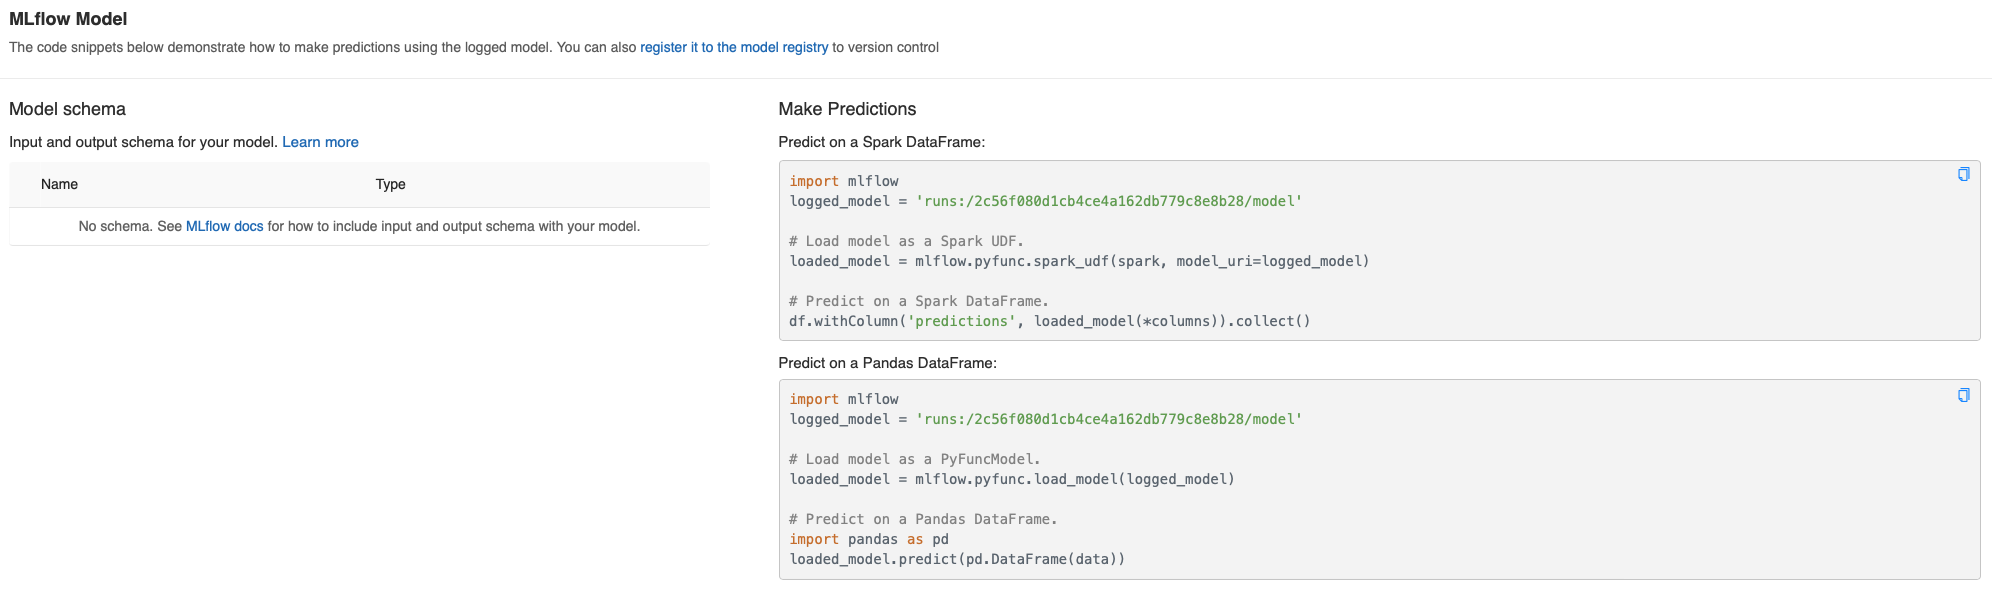
MLflow Prediction Example
import mlflow
logged_model = 'runs:/2c56f080d1cb4ce4a162db779c8e8b28/model'
# Load model as a PyFuncModel.
loaded_model = mlflow.pyfunc.load_model(logged_model)
print("Load Model Done!")
# Predict on a Pandas DataFrame.
import pandas as pd
result = loaded_model.predict(pd.DataFrame([[1.0, 2.0, 3.0, 4.0]]))
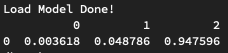
print(result)코드를 돌리면 다음과같이 출력된다
반응형